In this article I will explain with an example, how to add
ReportViewer control to
Visual Studio 2022
Toolbox.
The
Report Viewer Control is available in
Nuget package and no longer shows in the
Visual Studio Toolbox by default. So, you need to add the control to the
Toolbox manually.
Installing ReportViewer Control from Nuget
First you need to install the
ReportViewerControl package from
Nuget using the following command.
For Web Form
Install-PackageMicrosoft.ReportingServices.ReportViewerControl.WebForms
For Windows Form
Install-PackageMicrosoft.ReportingServices.ReportViewerControl.WinForms
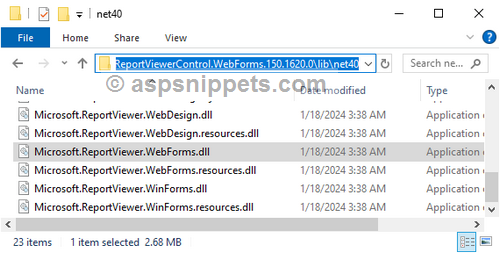
Once the package is successfully installed, the
Nuget package will be installed in the solution directory of the project and the dll is available in the location as follows.
Windows – {Solution Directory}\packages\Microsoft.ReportingServices.ReportViewerControl.Winforms.{version}\lib\net40
Web – {Solution Directory}\packages\Microsoft.ReportingServices.ReportViewerControl.WebForms.{version}\lib\net40
Adding ReportViewer to Toolbox
First step is to right click inside the Toolbox and click on Add Tab.
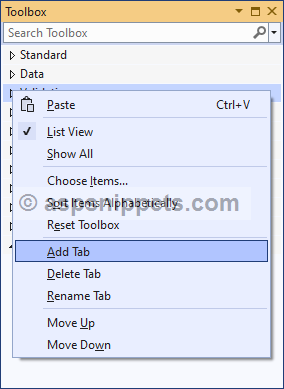
Now you need to set a suitable name to it.
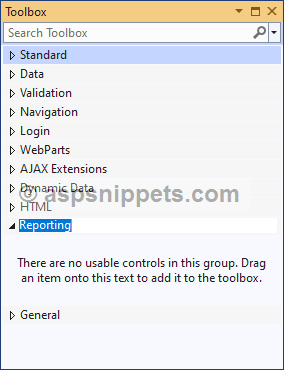
Now inside the newly created Tab, you need to right click and then click on Choose Items.

Then, inside the Choose Toolbox Items dialog, select .NET Framework Components tab and then click on Browse button.
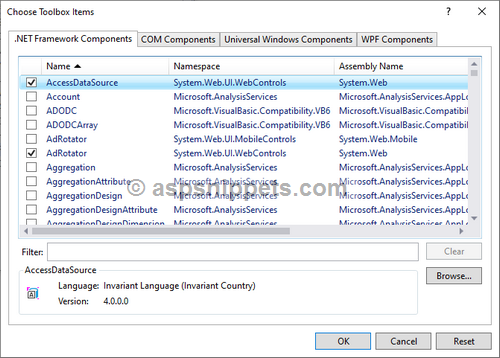
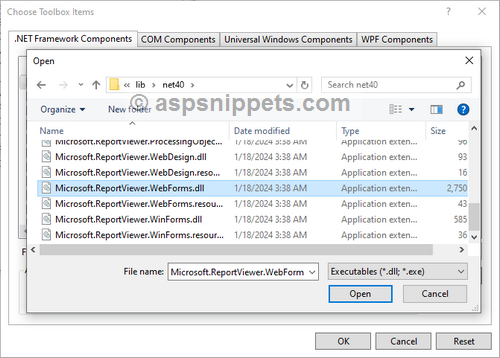
Above action will open the Choose item dialog box, there you need to select the Microsoft.ReportViewer.WebForms.dll file from the installed folder and then click on Open.
14
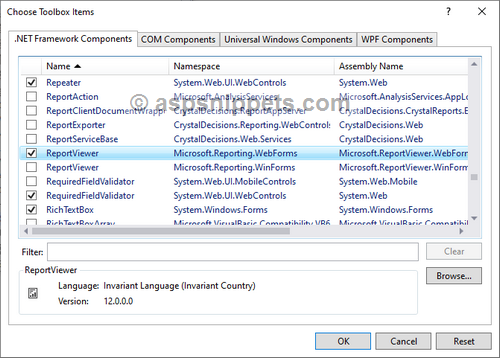
Now you will notice that the ReportViewer control is now available in the Choose Toolbox Items dialog and click on OK.
Finally, the ReportViewer control will be added to the
Visual Studio 2022 Toolbox as shown below.
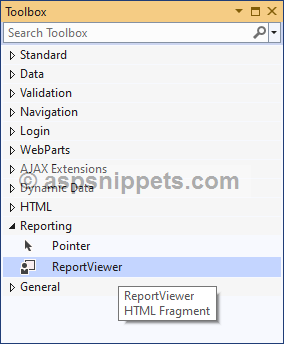
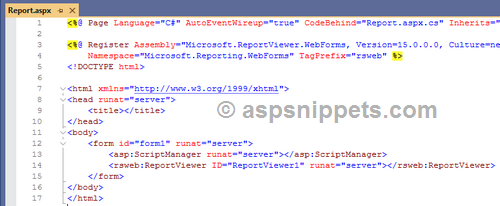
Now drag and drop ReportViewer from Toolbox to Web Form which will be displayed as shown below.